Selling remotely: A proven 11-step workflow to grow your business with remote sales calls and webinars
(By the way, to get articles like this free in your inbox, subscribe to our newsletter.)
Our entire workflow for setting up and presenting successful remote sales calls and webinars, including…
- Three reasons why we sell remotely—and why you probably should too.
- Some great technology that will hugely improve the quality of your video sales calls and webinars.
- Proven templates for all the documents you’ll need to create a webinar (emails, blog posts, etc.).
- “Don’t forget to go to the toilet”: The checklist we follow just before a video sales call or webinar.
- Some easy-to-make embarrassing webinar blunders we’ve made, and how you can avoid them.
- How to edit the slides and video and post them to your blog.
Recent updates are highlighted.
Why you should consider hosting webinars
Webinars and remote sales calls are highly effective for communicating with your target market. Many people are surprised that we have brought in many top brands as clients without ever having traveled to their offices.
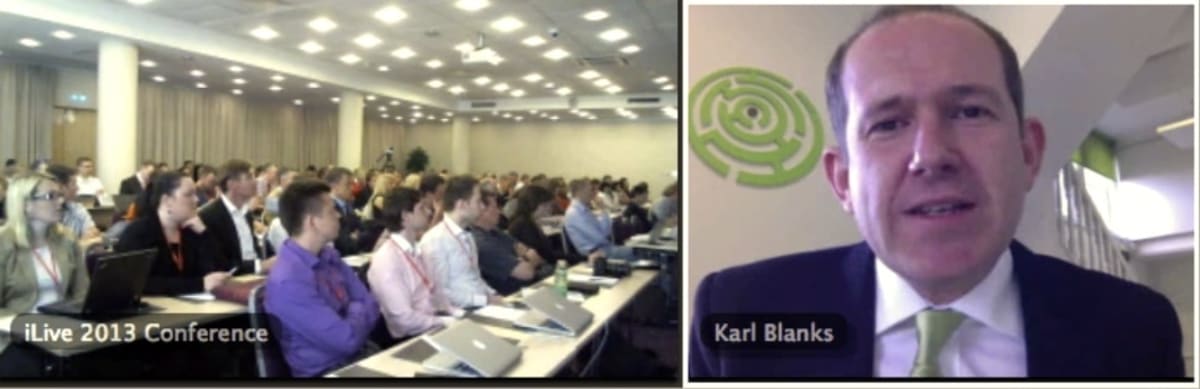
We now turn down almost every conference speaking request, and instead we spend that time giving webinars. We have even presented remotely at “real-life” conferences:
We estimate that switching from conferences to webinars has saved us a month per year that we would otherwise have spent traveling. It’s hard to quantify how much time we save from using web conferencing software for sales calls. One of our team members can now carry out seven international sales calls a day. Face to face, that would take over two weeks.
Webinars have three huge benefits over other marketing channels:
- They allow a level of rapport that articles don’t.
- They are time-efficient, for you and for the attendees, who don’t need to travel to a conference either.
- They are highly scalable. It’s unusual to have more than 100 people attend a talk at a web conference, but it’s normal for a webinar.
However, no other marketing medium presents more opportunities for messing up. They are like a stressful cross between organizing an international conference, giving a presentation, and making a VoIP call. Over the years, we’ve accumulated many tips for getting the best results from webinars, usually by making mistakes then asking ourselves, “How can we safeguard against that ever happening again?”

If you want to do only remote sales calls, and not webinars, then read Steps 1 and 3, and then skip to Steps 7–11.
Step 1: Get the right technology
- If you’re wondering how our voices sound so professional (why are you laughing?), it’s because we use a great microphone (the Blue Yeti) with an anti-pop screen (like this one). We’ve recorded a comparison of the different microphone options, so you can hear what a huge difference it makes.
- Find a quiet, echo-free room from which to present: When we first started hosting webinars, our office was very echoey. So we had the walls lined with Ecophon Akusto wall panels, and we had Ecophon Solo panels suspended from the ceiling. Now it’s like a recording studio in there.
- A good external webcam is better than the webcams in most laptops, making you look much better. The Logitech C920 HD Pro webcam works well. If you want to step it up a level, see Aaron Shekey’s guide to attaching a real digital camera or video camera to your computer using an Elgato Cam Link.
- Aaron Parecki published a list of tips and tools for improving your remote meetings and presentations. It contains some great recommendations for headsets, microphones, and webcams.
- We have a “Do Not Disturb” sign for the door. This kind of thing, (not this one!).
- The webinar software we use is GoToWebinar. For calls with fewer than 25 attendees, we use GoToMeeting, which we have used for years. Many people prefer Zoom.


Step 2: Have a kick-off meeting to agree the details of the webinar
We recommend you co-present webinars with other companies. That way, you provide valuable content to their subscribers, and in return you get exposure to a new audience. The following points will be useful when you have the first phone meeting with the people with whom you’ll be presenting:
- Before or during this kick-off meeting, send out a Google Doc that contains the planning templates for the webinar. To save you loads of time, here’s our template.
- Agree on the title of the webinar. (Ideally, it would be a subject about which you have already created content.) As with all good headlines, a good title will compel the visitor into wanting to know more, probably by speaking in terms of benefits. Our talk about usability, for example, was called “Conversion mistakes we’ve made. And how conversion affects SEO. With Rand Fishkin.”
- Agree who will be presenting, who will be moderating and who will be organizing (that is, setting up the webinar software).
- Create an outline for the webinar, so each presenter knows how many minutes they can speak for. It’s a good idea to have 15 minutes for questions at the end. Agree now who will answer the questions.
- Assign one of your colleagues to join the webinar as an attendee, so they can see and hear what the attendees see and hear. If, at the start of the webinar, you accidentally start showing your screen without realizing it, this person can notify you.
- Agree upon the time and date for the webinar:
- Should you have multiple sessions for different time zones? Remember that time zones vary by date, so don’t just look at the time differences as they are today. Instead, use TimeAndDate’s Meeting Planner or EveryTimeZone (which is more accessible).
- Don’t have a webinar on a national holiday. Use Google Calendar’s “interesting calendars” feature to automatically add different countries’ national holidays to your calendar.
- Ensure that the presenters, moderators and organizer will join the webinar half an hour before it starts (so they can check that the technology is working).
- Agree a time and date several hours before the webinar to have a “dress rehearsal,” to agree on the final details and to test the slides and the technology. A 30-minute call should suffice. Twice during such calls we’ve encountered major problems. On one occasion, the other presenter took half an hour to get the technology working. On another, only a quarter of our screen was visible. You don’t want to leave that kind of problem till the day of the webinar.
- Agree a time and date for a post-webinar de-brief call, to review any remaining tasks that need to be completed.
- Agree if and how each party will we be promoting the webinar to its followers.
- Give the presenters, moderators, and organizers the URL of this article (the one you’re currently reading), so they can follow this checklist themselves.
- Ask for photos of the presenters, and the email addresses of the presenters, moderators, and organizers. Also, share cell phone numbers in case any one of you needs to be contacted in an emergency.
- Confirm in writing everything you’ve just agreed. You can do this by emailing the URL of the “planning” Google Doc to the presenters, moderators and organizers.
Step 3: Set dates in your calendar
- Send calendar invitations to the presenters, moderators, and organizers.
- Reserve the room from which you’ll present the webinar. You don’t want to start the webinar out of breath because you’ve just had to wrestle several people out of the room. (Incidentally, this task is in the “calendar” section because we book resources using our online calendar. The room from which we present has its own calendar.)
- Invite someone to be in the same room as you during the webinar—so they can be a “runner” if you need anything. It could be the same person who will be attending the webinar as a guest.
Step 4: In Google Docs, draft the blog post to announce the webinar
- The blog post is surprisingly fiddly to set up, partly because the time zones are difficult to explain (and GoToWebinar doesn’t make things easy). This example of an announcement blog post has all the necessary parts. By drafting it in Google Docs, you can show it to the other parties before it goes live. This also saves you from the chicken-and-egg situation whereby you can’t publish the blog post till you have the GoToWebinar sign-up URL to include in it, but you can’t set up GoToWebinar until you have written the description of the session.
Step 5: Set up GoToWebinar
- Be careful who sets up GoToWebinar, because this person will receive all of the email inquiries (and there may be tens or hundreds of them).
- Copy and paste from the Google Doc the description of the session and the follow-up emails.
Step 6: Publish the blog post announcing the webinar
- Once all the parties have agreed upon it, transfer the blog post from Google Docs to your site and to your co-presenter’s site.
- Follow your publicity plan for the post. (Email your subscribers, etc.) We usually send just one notification, because that’s what we’d do to a friend—and we treat our subscribers like our friends. (In fact, many of them are our friends.) Most companies find that they get higher sign-up rates by sending out a series of emails in the days leading up to the webinar.
Step 7: Write the talk and create the slides
- For remote collaboration, we much prefer Google Slides to PowerPoint.
- If you’re using PowerPoint, send a slide template file to each person who’ll be creating slides. If you’re using Google Slides, simply send the link to the slide deck.
- In this article we’ll not address how to write the webinar talk itself. Instead we’ll focus on the activities that are specific to webinars. If you want advice on how to structure a persuasive, valuable talk, then see “How to beat most professional copywriters,” which contains a highly effective template for creating persuasive messages. Nancy Duarte’s book, Resonate, is great too. If you want inspiration for creating slides, SlidesCarnival and SlidesGo can be useful.
- Script into the webinar talk a second introduction for latecomers.
- GoToWebinar’s interface shows how many people are actually watching the slides (as opposed to having the GoToWebinar window open in the background). You can increase the number of active viewers by regularly saying “Look at this slide” during the talk. Include in your script reminders to do this.
- When the presenters have submitted their slides, combine them into one slide deck and check that all of the fonts and transitions have worked. Tip if you’re using PowerPoint: When you paste in a new slide, you’ll see a small clipboard icon that asks you whether to “Keep Source Formatting” (choose this one!) or “Use Destination Theme” (don’t use this one, unless you secretly hate your co-presenter and want to hear them cry in front of a thousand people. The button might as well say “Ruin Slides.”)
Step 8: The day before the webinar
- In case of emergency, print the following:
- Your slides (and annotate them if needed).
- The dial-in details.
- The “planning” Google Doc (which includes emergency contact details).
- Join the webinar, to check that your software is working—and that you have the link! Doing so will also reveal whether your webinar software client needs updating.

Step 9: About 30 minutes before the webinar
- Put the “Do Not Disturb” sign on your door.
- If you’re using one, make sure your Bluetooth headset is fully charged.
- Restart your computer (or, at the very least, free up your computer’s memory.
- Turn off any software that might slow down your computer, hog your bandwidth or hijack your screen:
- Close any applications you won’t be using—including ones that only appear in the Menu Bar.
- Close any software that is likely to seize control of your screen. For example, instant messaging software, calendar software or notification software.
- Turn off backup software (like Time Machine).
- Turn off file-sync services (like Dropbox and Google Drive Filestream).
- If you use Apple macOS, open Notification Centre, scroll to the top, and activate “Do Not Disturb” mode, to prevent any embarrassing messages you receive during the webinar from appearing on your screen. Another way to activate “Do Not Disturb” mode is to hold down the “Option” key while clicking on the right-hand side of the Mac’s Menu Bar.
- If you use Windows 10, right-click on the notifications icon in the taskbar and select “Turn on quiet hours.”
- If you have it (and if you don’t, you’re missing a trick) activate Owly (for macOS), which stops your computer from going to sleep or starting your screen saver.
- Set yourself a reminder to restart your computer afterwards, so all of the above software starts again.
- Ensure your backup internet connections are ready (your wireless card, phone tethering, etc.).
- Minimize any possible sources of noise: Turn off doorbells, unplug unneeded cell phones and landline phones (note that a phone in vibrate mode can still make a lot of noise). Close windows. If your door is locked, take the keys out of the door, in case someone needs to let themselves in. If you work from home, ensure that the washing machine or dishwasher isn’t on. You don’t want to have to talk over a spin cycle.
- If you’ll be browsing the web during the webinar, open a single, blank browser window in “Incognito” mode in a browser you don’t normally use. Delete the history from your web browser, so people can’t see your history and bookmarks.
- Tidy up your computer’s desktop.
- Expand your browser’s viewing area—for example, by hiding toolbars you won’t need.
- Unplug any external displays before you begin, and present the slides from your main screen. (An external display is one more thing that can go wrong.)
- Most webinar software allows you to record the webinar. However, also start ScreenFlow (for macOS) or Camtasia (for Windows), ideally on another computer, to create a backup recording. For a second backup, start a digital recorder recording.
- Join the webinar. If you’re using a phone, not VoIP, check that “Mic and Speakers” is deselected in the webinar software’s control panel—otherwise you may hear loud feedback noise. Remember that, depending on the webinar software’s settings, your voice may be heard by the other presenters or attendees as soon as you open the webinar software.
- If you’ll be using the webinar software’s “Mic and Speakers” VoIP service, then, regardless, activate the “Telephone” option, and write down the dial-in details. Then, if VoIP fails at any point, you can dial-in with a normal phone. Even better, you may choose to dial in via phone regardless, and then mute the phone, so if the VoIP fails at any point you can immediately switch to the phone.
- The presenter should click “Record” when the webinar starts.
- Make the webinar software’s window as small as possible, and move it just beneath your webcam. That way, you’ll be looking almost directly at the camera throughout the call, which improves engagement.
- Throughout the session, all presenters should ensure that they view the “Chat” section of the webinar software’s control panel, in case other presenters need to contact them. If one of the presenters isn’t paying attention to your chats (perhaps their “Chat” panel is collapsed), here’s a clever way of getting their attention: On the webinar, tell the presenter that you have just chatted the URL of a resource to them, and ask them to forward it to all of the attendees. Then chat to them the URL of the resource along with a message saying “Please pay attention to my chats!”
- Set up a spare laptop (if you have one) on your desk. Join the meeting as an attendee on it. This allows you to see what the attendees see. We usually have the laptop attended by the person we have assigned as the “runner.” The runner will spot if there’s a time lag between you showing a slide and the audience being able to see it. Or, even worse, they’ll spot if your connection has frozen. (Otherwise, if that happens, it’s possible not to know about it for minutes.)
- Start up instant messaging so you can communicate with other presenters if anything goes wrong.
- If anyone else is using the same Wi-Fi connection as you, ask them to switch to an alternative until the webinar is over.
- Have a last-minute wee. You’ve earned it.
- Put a glass of water on your desk, in case your voice dries up during the recording.
- Open an app (such as Photo Booth on macOS) that lets you check you look good on webcam.
- Let the other presenters know that the moderator will be controlling the slides during the presentation, so to advance the slides the presenters will need to keep saying “On the next slide, you’ll see…” or “If you move to the next slide, …” or “[Presenter’sName], if you could move to the next slide.” This turns out to sound less awkward than you might expect. Alternatively, you can “Give Keyboard & Mouse” to them, but be aware that their mouse movements can wreak havoc if you forget to disable them when it’s your turn to speak.
- Set an alarm for 15 minutes before the end of the call, to remind you to start wrapping up.
- Listen to some exciting music as loud as you can bear, to energize yourself. Here’s our Spotify playlist of exciting songs—though you’ll probably want to create your own.
Step 10: Present the webinar
- Throughout the webinar, the moderator should watch the “Questions” and “Chat” panes in GoToWebinar’s control panel.
- When the talk starts, mute any presenters who aren’t speaking, to minimize any background noise, and to reduce the likelihood of bandwidth problems.
- Our article “Answers to your hardest remote-working challenges” contains many tips for using video conferencing software.
Step 11: After the webinar has finished
- Make sure you end the session, by closing GoToWebinar altogether. It’s surprisingly easy to leave it running. Don’t be fooled into thinking that the “Stop showing screen” button will stop the audio too.
- Convert the movie file of the recording (using GoToWebinar’s conversion software).
- If agreed beforehand, export the GoToWebinar reports and send them to the other presenters. Read all of the attendees’ questions, even if you haven’t promised to reply to all of them. Sometimes they contain personal messages that require action.
- Restart your computer, to restart the software that you paused (Dropbox, Time Machine, etc.). Also, unmute phones, and undo any other changes you made during Step 9.
- Upload your slides to whichever platform you use to share slides. If you have used any non-standard fonts, then save the file as a PDF before uploading them, otherwise they’ll look terrible.
- Edit the video (using ScreenFlow or Camtasia): Crop any excess content from the start and end of the video. Optimize the sound by maximizing its volume, being careful that none of the peaks get too loud (in ScreenFlow they appear red when this happens). ScreenFlow has a feature called “Smooth volume levels,” which can be useful. However, if the other presenters are consistently quieter than you (because they don’t have an awesome microphone, perhaps), then it helps to turn their sections of the audio into separate clips, and then to edit the volumes of those clips independently. Export the video on “Web – High” setting. Then upload the video to your video-hosting service. We love Wistia, but you may prefer Vimeo or YouTube.
- Embed the slides and video into a blog post. Don’t skip this stage; for every person who attends one of our live webinars, there are more than five people who see the video recording and/or the slides. Rather than create a new post, we edit the one that we used to announce the webinar, because it’s not needed any more, and there might still be links pointing at it.
- Publicize that it’s published (email your subscribers, share it on social media, etc.).
Good luck, and let us know how you get on!
How much did you like this article?
© 2026 Conversion Rate Experts Limited. All rights reserved.
A Brandwidth Group Company.